How to Sharpen a 2.0mm Lead: Coning, Step by Step
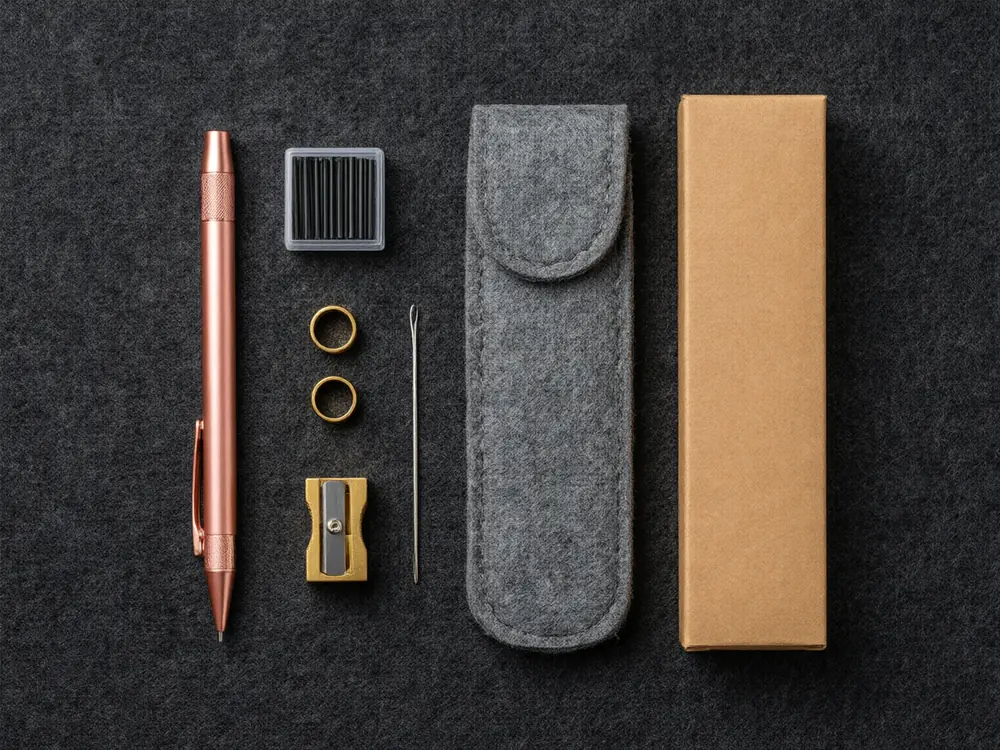
Every 2.0mm lead arrives blunt: a flat-ended graphite rod with a grade printed on the side, no point, no personality. The tool doesn't come alive until you cut a cone into that end, and that's the part nobody teaches you. One pass at a pointer gives you a tip fine enough to ink a door hinge; roll the same lead onto its side and you can fill a shadow with a soft gray band. Everything else — the brass body, the sliding ring, the heft of the core — is furniture around that cone.
Most people discover this the hard way: first week, a kitchen pencil sharpener, forty millimeters of wasted lead. It isn't fussy. It's a ninety-second procedure with the right tool — the steps, the three cone angles, and what to do when the point won't hold.
Why a wooden pencil sharpener destroys a 2mm lead
A wooden sharpener assumes there is cedar holding the graphite: its blade carves wood and only trims the core once the wood around it is gone. Feed a bare 2mm rod in and the geometry fails twice. First, the throat is sized for a 7–8mm body; a 2mm rod has nothing to ride on, so it sits off-axis and the blade catches it sideways. Second, when that blade grabs graphite it grabs it wrong — soft 2B smears against an angle designed for cedar, clogs the throat, and chews the rod into a broken stub within a turn or two.
People search this as "how to sharpen mechanical pencil lead." The honest answer: nothing in your kitchen drawer will do it, and a fine 0.5mm mechanical has nothing to cone. A 2mm lead needs a tool whose whole job is shaving graphite, and no wood. That tool exists, and it's the size of a bottle cap.
Three ways to make a cone, ranked
1. A dedicated lead pointer — the one to buy
A lead pointer is a brass thimble with two cross-blades at a shallow angle and a lead-sized hole through the middle. Insert the lead, twist, and the blades cut a clean, centered cone in three or four turns. Mine has lived loose in a pencil roll for two years and still cuts straight. The rest of this article assumes you have one — ours ships in the eight-piece magnetic lead holder kit at the bottom of this page.
2. Sandpaper pad or emery board — good for touch-ups, poor for coning
An abrasive pad cuts a cone by hand. It works, after a fashion: two minutes of careful rubbing and you get a taper. But the apex almost always ends off-center and slightly rounded, because grit wears the tip faster than the sides. Keep a board in your roll for dressing edges — it's the best tool for the flat chisel below. Just don't rely on it to establish the cone.
3. A craft knife — don't
People do carve leads with blades. You get facets where you wanted a cone, an edge that digs into paper instead of gliding, and a real chance of a sliced thumb. Skip it.
Coning, step by step
The procedure I teach students, blunt lead to tested line: about ninety seconds.
- Expose 5–6mm of lead past the sleeve. Too little and the pointer's hole can't swallow the rod; too much and you're holding a flagpole that flexes while it's being cut. This is where magnetic ring control earns its keep — on our holder, slide the ring until the exposed stub just fills the pointer's barrel, and no further.
- Seat the lead in the pointer, holder vertical. Drop the tip in until it touches the cross-blades and keep the body straight up. Tilting now puts the apex off-center, and every line afterward will feel it.
- Rotate three to four turns, listening to the resistance. Twist the holder, or spin the pointer around the lead. The first turn cuts hard; the second and third lighten as the cone forms. When the cut goes feather-light, the cone is finished — further turning is just shortening the lead.
- Check the cone against light. Hold the tip up to a window or your phone screen. A good cone is symmetrical: an even taper to a centered point. A flat facet on one side means you tilted in step two — retract a few millimeters and recut.
- Test it on scrap. Draw on the apex: a crisp line about 0.5mm wide. Roll the lead onto its side: same rod, a 3mm band of soft gray. If the apex scratches or crumbles, the lead is too soft or the cone too long — take a turn off.
- Retract before you draw. Slide the lead back to 2–3mm of exposure. A fresh cone is at its longest and weakest exactly when you put it on paper, and the sleeve is the only thing keeping it alive.
Three cone angles, three lines
One lead, three working shapes — and you can see the difference in a single stroke.
Sharp point — detail line
Cut the cone long and narrow, roughly 2mm from apex to shoulder. For hinges, pins, lettering, facial features — anything that must stay under 0.6mm at normal pressure. Keep it short in the sleeve, or it grinds itself away inside a page.
Medium cone — the working line
The default: three or four turns at the pointer, a taper you'd call pencil-shaped. On the apex you get about 0.6mm; tipped a few degrees you get a confident 1.5mm drafting line. Walls, figures, contours. If you only ever cut one cone, cut this one.
Flat face — tone laying
Now deliberately ruin the procedure. Abrade the apex flat on an emery board and you have a chisel edge 3mm wide. On its side, that edge lays an even band of gray — sky, a shadow, the tone behind a tree — in one pass instead of twenty scribbles. Soft leads do it best; what 2B actually means matters more for covering area than for lining edges.
Keeping the cone
Two habits separate people who enjoy 2mm from people who give it up. First: clear the pointer. Graphite dust collects in the hole and on the blades, and after a dozen sessions that dust polishes cones round instead of cutting them pointy. Blow it out when a pile of gray flakes shows up on your desk.
Second: never draw with — or cut — a lead standing proud of the sleeve. Long exposure is the number-one cause of snapped tips. If fresh cones keep snapping the moment you press, the problem is the grip, not the point — we catalog the six real causes of lead breakage here. And if you're still deciding whether the whole 2mm world is worth two minutes of sharpening, start with lead holder vs mechanical pencil.
Frequently asked questions
Can I sharpen a 2mm lead with sandpaper instead of a pointer?
Use sandpaper for dressing, not cutting. An emery board trues up an existing cone, and it lays down the flat chisel edge for shading better than any pointer. But a full cone cut by hand takes minutes and ends off-axis, with a rounded apex that never draws crisp. Pointer for the cone, board for the edge.
Why does my lead keep breaking while I sharpen it?
Almost always exposure. Beyond 6mm, unsupported graphite bends at the sleeve instead of turning cleanly, and it snaps at the jaw line before the first cut finishes. Expose only what the pointer's barrel swallows, hold the holder vertical, stop rotating when resistance goes feather-light. If tips snap during drawing too, the cause is in the jaws, not the blade.
How far should the sharpened tip stick out when I draw?
Two to three millimeters. The longer the rod behind the cone, the more it flexes, and a proud lead loses a fresh cone on the first hard crosshatch. Advance a bit, draw, advance again — the same discipline a carpenter runs.
The brass mini lead pointer is in the box: shaves graphite only — no wood, no shavings. Slide the magnetic ring to expose the lead to exactly the right length, then cone it. 4.2★ from 3,145 Amazon ratings.